The Blog
Shift Your Perspective on Personal Health.

A Step-by-Step Guide to Making Your Own Essential Oil Roller Bottle
“I accumulated small but consistent habits that ultimately led to results that were unimaginable when I started.” - James Clear
Introduction:
Hey there, Oil Enthusiast! I run into people all the time who have essential oils at home but have never made a roller blend. Little do they know what they are missing out on. Today, we're diving into the wonderful world of essential oil roller blends – those little magic wands that bring aromatherapy wherever you go.
Whether you're seeking relaxation, energy, or a mood boost, crafting your own essential oil roller bottle is a delightful and personalized way to harness the power of nature and help you stay consistent with your oil creations. Let's roll up our sleeves and get started!
Stay tuned to the bottom to learn how you can download my free essential oil guide!

Here is your step-by-step guide to creating your first roller blend. 👊
1. Gather Your Supplies
Before we embark on our roller bottle adventure, let's gather our supplies. Here's what you'll need:
Fractionated Coconut Oil Carrier oil (the sidekick that makes it all possible)
10mL Roller bottle (Here is a link to Amazon)
Funnel (to keep things neat and tidy)
Labels (Check out these Labels at Fun Oil Stuff)"
2. Choose Your Essential Oils
Essential oils are like the artists in your roller bottle masterpiece. Think about what you need – relaxation, focus, or a mood lift? Lavender for calm, peppermint for a refreshing kick, or citrus oils for a cheerful vibe? Mix and match to create your unique aroma symphony.
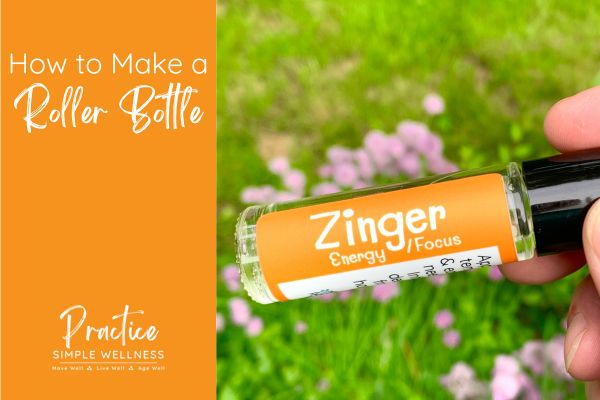
For today, let's create a Focus/Energy blend called the Zinger. Grab your Peppermint & Wild Orange!
3. Add the Essential Oils to the Roller Bottle
Now it's time to set the stage for your essential oil masterpiece. Grab the Peppermint oil first and carefully add 20 drops to your roller bottle. Don't turn the bottle completely upside down! Just tip it up enough that the first drops start to come out. Count your drops and don't worry if you get an extra drop or two.
Then grab your Wild Orange and add 10 drops to your roller.
If making your own blend, simply follow a recipe or let your intuition guide you, adding around 20-30 drops of essential oil in total (for adults).
4. Add Your Carrier Oil
Carrier oils are like the dance partners that help essential oils shine.
What are the benefit of using a carrier oil??
They dilute the oils and make them safer for direct skin application.
They slow down the evaporation process helping more oils to absorb into your skin.
They help us spread the oils out over a bigger area on our body.
Studies show that diluted oils are just as effective, if not more effective, than using oils straight.
Carrier oils protect our skin so we don't develop skin sensitivities over time.
Lots of good reasons to incorporate a carrier oil!! Use a pump top with your fractionated coconut oil or a steady hand to add your chosen carrier oil to the roller bottle, leaving some space at the top for the roller top
5. Finish It Up!
Put the roller cap onto the bottle and push it all the way down (so there is no gap between the cap and the bottle. Add the bottle cap and give it a gentle shake. Once the oils are mixed, they are mixed!
Add your label or stickers so you know what's in the bottle. (Don't skip this part!) I can't tell you how many rollers I've had over the years that were unlabelled and I couldn't remember what was in them :(
Always label!
6. Time to Use Your Blend!
Time to put your roller bottle to work!
Where do we put it??
If the blend is for a particular health issue, apply it where you need it! On the tummy for tummy troubles, on your head for head tension, on your knees or low back (or wherever you have muscle/joint issues), etc.
For emotional stuff or lungs, apply the blend to your chest and throat.
For our example Zinger blend - apply to the chest, back or neck, or forehead*.
*NOTE: Wild Orange is a sun sensitizing oil - don't apply to exposed skin and then go out in the sun! Only apply to areas that aren't exposed to the sun when going out.
7. The Secret Sauce of Roller Blends....
One last thing!!!
There is an extra secret step to using roller blends that you want to know about.
After you apply the oil to your skin, it's important to hold your hands or the roller bottle up to your nose and take several deep breaths. The nose is the fastest way to get oils into your system - much faster than topical use.
So breath it in and get them working in your system while the oils are absorbing through your skin. :)
Conclusion
Congratulations, DIY maestro! You've just unlocked the art of making your own essential oil roller bottle. By blending nature's aromatic wonders and your creativity, you've crafted a personalized wellness tool that's ready to accompany you on your daily adventures. From relieving stress to boosting your mood, your essential oil roller bottle is a testament to your creativity and commitment to well-being. So, roll with the good vibes, and let your aromatic journey begin! 🌿🌟
Want to see it in action?? Check out our quick video on making roller blends here:
Looking to get started with essential oils??
Is Video Your Thing?? Check out the Practice Simple Wellness YouTube Channel!

Studio Location
1100 W. Garfield Ave.
Bartonville, IL 61607
Work with Us
Other Programs
Copyright ©2023 - Practice Simple Wellness

